EAT RAINBOW LOVE


University of Birmingham graduate with a passion for food & cooking as part of a healthy lifestyle

Twitter: @EatRainbowLove
Instagram: lottierainbow
Showing posts with label chocolate. Show all posts

Monday, 12 May 2014

Malteser rocky road

Crunchy biscuit, maltesers & honeycomb with white chocolate chips and soft, squidgy marshmallows
 All coated in rich dark chocolate
 Everyone needs to taste these

Makes 12 rocky road
- 125g slightly salted butter
- 200g dark chocolate
- 3 tbsp golden syrup
- 200g dark chocolate biscuits, crushed
- 100g Maltesers, cut in half
- large handful of honeycomb pieces
- large handful of mini marshmallows
- handful of white chocolate chips
1. Melt the butter and chocolate in a saucepan over a low heat, stirring frequently. 
2. When melted and smooth, take off the heat and leave to cool down for a minute or two.
3. Next, stir in the golden syrup to the melted chocolate and mix in all of the other ingredients - biscuits, Maltesers, honeycomb, marshmallows and white chocolate chips.
4. Grease and line a tin then spoon in the rocky road mixture, and flatten down with the back of a spoon. Top with some extra white chocolate chips and mini marshmallows.
5. Leave to set in the fridge for around 2 hours, then cut into 12 squares.

Enjoy :)

You may also want to try Mini Egg rocky road!

Thursday, 17 April 2014

Mini egg rocky road

Easy to make and incredible to eat - the perfect treat for Easter!

Makes 8 rectangles or 12 squares
- 125g slightly salted butter
- 200g dark chocolate
- 2 tbsp runny honey
- 200g dark chocolate biscuits
- 75g dried cranberries
- 100g mini eggs
- handful of white chocolate chips

1. Line and grease a baking tin and set aside.
2. In a pan, heat the butter and dark chocolate and stir until melted, then stir in the honey.
3. Crush the biscuits until mostly crumbed but with some chunks, then stir into the melted chocolate mixture with the dried cranberries and mix until well combined.
4. Leave to cool down a little for a few minutes, then stir in most of the mini eggs, leaving 8 or 12 to place on top depending on how many rocky roads you're making.
5. Pour/spoon the mixture into the prepared tin and smooth down, then place the mini eggs on top and scatter with the white chocolate chips.
6. Leave to set in the fridge for about two hours, then using a sharp knife cut into rectangles or squares.
Enjoy :)

You might also like to try delicious Creme Egg Brownies this Easter!

Saturday, 1 March 2014

Easter chocolate biscuit squares

The quickest, most delicious chocolate treats that you will want to make them time and time again.
Top with mini eggs or these cute flower decorations (from Sainsbury's) for Easter/Spring!
This is a recipe I've posted before - I named them Chocolate Smartie Squares because I usually top them with smarties: find here!

Makes 16 squares
- 50g margarine
- 150g dark cooking chocolate, broken into pieces
- 2 tbsp runny honey
- 250g digestive biscuits, crushed
- 16 mini eggs or edible flower decorations
- edible glitter (optional)
1. Line a square tin (7 inch) with grease proof paper, and grease with margarine. (make sure the paper sticks up out the sides of the tin as you will need to use this to grip when removing the squares from the tin)
2. Melt the margarine, chocolate and honey in a saucepan over a low heat, stirring occasionally.
3. Remove from the heat and add the biscuit crumbs, mixing thoroughly until coated.
4. Spoon into the tin and push down, smoothing the top. Mark into 16 squares with a sharp knife, and place a mini egg or edible flower decoration in the centre of each, and sprinkle with edible glitter (if using).
5. Leave to set in the fridge for a couple of hours, then break into the squares and serve.

Enjoy :)

Friday, 7 February 2014

Valentine's chocolate & raspberry cupcakes

Double chocolate chip cupcakes with a raspberry jam centre, chocolate frosting and a raspberry topping
Perfect for Valentine's day - for your boyfriend, girlfriend, friends, family, or just for yourself!
They taste divine too

Makes 18 deep cupcakes
- 225g margarine
- 225g caster sugar
- 4 eggs, beaten
- 225g self raising flour
- 1/2 tsp baking powder
- dash of milk
- 1 tsp vanilla extract
- cocoa powder
- 100g milk chocolate chips
- raspberry jam
For the frosting and topping
- 200g butter, softened
- 275g icing sugar, sifted
- dash of warm milk
- 150g dark cooking chocolate, melted
- fresh raspberries
- freeze dried raspberry pieces (or red sprinkles or hearts)
- edible glitter (optional)
1. Pre-heat the oven to 180 degrees and line a cupcake tin with cases. (Use special ones for valentine's day!)
2. In a large mixing bowl, cream together the butter and the sugar until well combined. Whisk in the beaten egg, then fold in the flour and baking powder.
3. Stir in the milk, vanilla essence, enough cocoa powder to change the mixture to a deep brown colour, and the chocolate chips. Mix until well combined and then spoon into the cupcake cases (about 2/3 full).
4. Bake in the oven for about 20 minutes or until a knife comes out clean from the middle.
5. Once cooled, cut the top centre out of each cupcake and spoon in a teaspoon of raspberry jam into each.
6. Place the tops back on (trying not to eat them) and set aside.
7. To make the chocolate buttercream frosting, beat together the butter, icing sugar and milk until smooth (be patient). Then stir in the melted chocolate.
8. Spoon the frosting into a large piping bag with a star nozel and get piping! (you can also just spoon and spread onto the cakes if you prefer)
9. Place a raspberry on the top of each cupcake and sprinkle with the freeze dried raspberry pieces, or whatever decoration you are using, and finish with a dusting of edible glitter.
They will look something like this when you finally get to eat them!
Enjoy :)

Tuesday, 19 November 2013

Marbled chocolate cheesecake

I wish I could say that I created this recipe but unfortunately, the triumph goes to Mary Berry. I made this for an anniversary party and was nervous because I'd never made a chocolate cheesecake before and didn't know how the marbled effect would turn out, but it was a massive success! Everyone loved it and it turned out to be the most popular dessert. It will definitely impress - super rich, creamy and chocolatey will always be a winner - people didn't believe that it was home-made! Don't shy away from making this because it's baked and more effort than just whacking it in the fridge, baked cheesecakes have a much more velvety texture and are just to die for. You have to make this, and it will be a recipe you are passing on for years, I just wish it was my own!

(I did change the measurements slightly - the original recipe only had 100g biscuits and I found that this just wasn't enough to fill the 8 inch tin)

Quick tip: use only the best ingredients when making a luxury dessert - for me this means McVitie's biscuits, lurpak butter, philadelphia cheese and proper belgium cooking chocolate!

Serves 8-10
- 150g plain chocolate digestive biscuits, crushed
- 75g butter, melted
- 150g plain chocolate
- 700g full fat soft cheese
- 225g caster sugar
- 1/2 tsp vanilla essence
- 2 eggs, beaten

1. Grease an 8 inch spring bottom cake tin and pre-heat the oven to 160 degrees / gas mark 3.
2. Mix together the melted butter and crushed biscuits and press firmly into the bottom of the cake tin.
3. For the cheesecake mixture, beat the soft cheese in a large mixing bowl until smooth. Stir in the sugar and vanilla essence and beat until glossy, then gradually stir in the beaten eggs until fully combined.
4. Melt the chocolate in a separate bowl.
5. Meanwhile, spoon half of the cheesecake mixture onto the biscuit space in separate blobs with gaps in between.
6. Add the melted chocolate to the other half of the cheesecake mixture and mix together until smooth and silky.
7. Spoon the chocolate mixture in between the cheesecake mixture already in the tin, then swirl the top to give a marbled effect.
8. Bake in the oven for 30 minutes or until the cheesecake is puffy round the edges but still soft in the middle. Turn off the oven but leave the cheesecake in there to cool. 
9. Once fully chilled (best overnight in the fridge), run a knife around the edge to loosen the cheesecake then gently remove and you are ready to serve!
Enjoy :)

Thursday, 7 November 2013

Halloween cupcakes

Sorry this post is so late - I'm going to try and post more frequently now although I am quite busy but I will do my best!

I thought I would share with you my Halloween cupcakes anyway, I made chocolate chip cupcakes with chocolate buttercream and they went down a treat. I have posted this same cupcake recipe time and time again so I will link it below for you to follow if these take your fancy and you want to indulge in some delicious, home-made chocolate cupcakes! The only difference is obviously the decorations on top (from Lidl) and that I put milk chocolate chips in the sponge. 


To make the chocolate buttercream just follow the same recipe above but add 100g dark cooking chocolate (I used Sainsbury's Belgium dark cooking chocolate) for a rich, chocolatey flavour. Never stint on ingredients when making buttercream - always use good chocolate and butter, for me, that's always Lurpak!
I just piped on the buttercream using a disposable piping bag and a large star piping nozel. I started to run out of icing though so I just spread the rest on but it still looked good!
Oh and the gold cupcake cases are from Sansbury's.

Enjoy :)

Tuesday, 28 May 2013

Oreo brownies

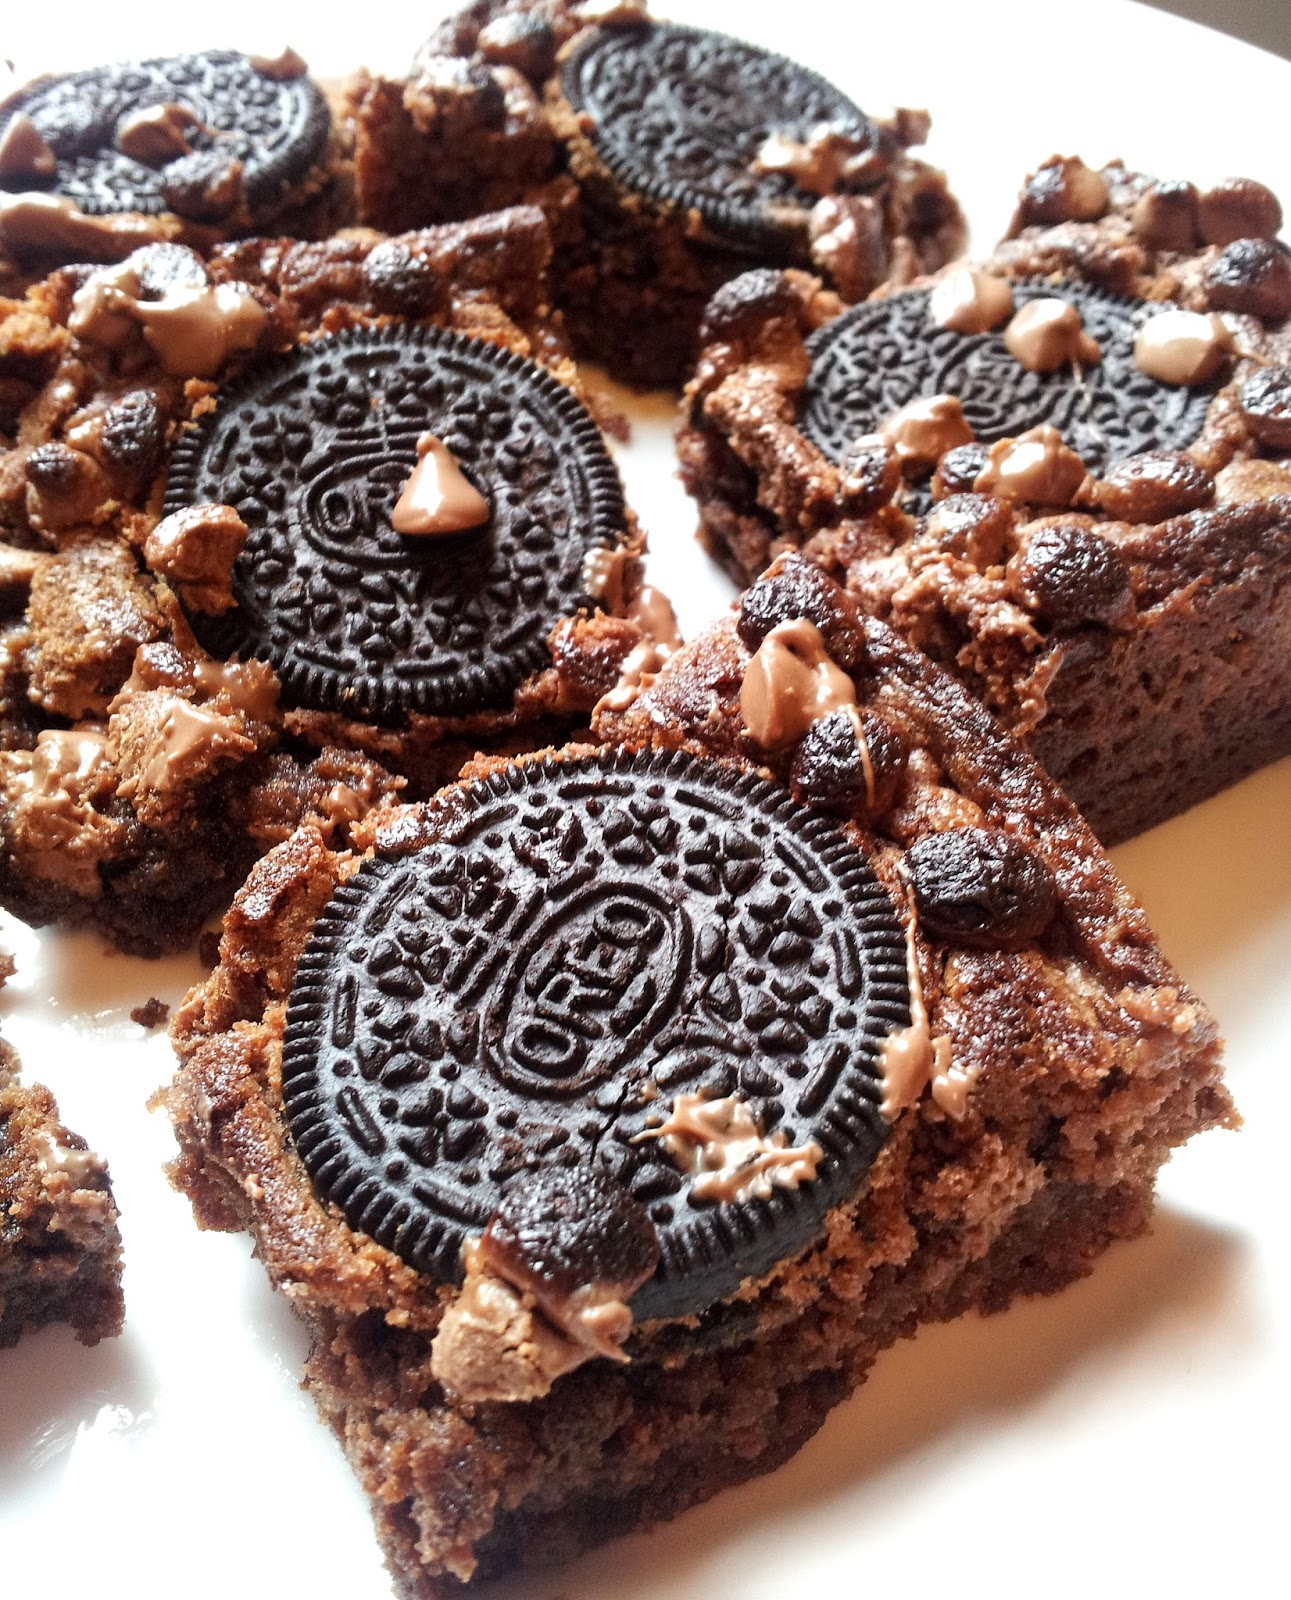
I just made these and tried them hot from the oven and they are divine! It was a bit of an experiment since I couldn't find a recipe for oreo brownies that I liked, so I came up with something and was very nervous but it worked out really well. They are moist and gooey in the middle, and a little crisp and chewy around the edges - the perfect combination. And with the added crunch from the whole oreos and cookie pieces (yes, there are crushed Maryland cookies in here too!), and the soft chocolate chips they have amazing texture. Everyone should go and make these right now, you won't be disappointed.
Makes 12
- 250g salted butter
- 225g caster sugar
- 2 eggs, beaten
- 50g dark chocolate, melted
- 2 tbsp cocoa powder
- 150g plain flour
- 1 tsp baking powder
- dash of milk
- 100g milk chocolate chips
- few Maryland double chocolate chip cookies
- 12 oreos

1. Pre-heat the oven to 180 degrees and grease and line a baking dish.
2. Cream together the butter and sugar in a large mixing bowl until light and fluffy.
3. Whisk in the beaten eggs then stir in the melted chocolate.
4. Fold in the cocoa powder, flour and baking powder until mixed well.
5. Stir in a dash of milk to make the mix creamier, then add half of the chocolate chips (50g) and a few (about 4) crushed Maryland cookies and mix until well combined.
6. Pour this brownie mixture into the prepared tin and spread evenly. Press 12 oreos into the mixture.
7. Bake in the pre-heated oven for around 25 minutes. Remove from the oven and sprinkle with the remaining chocolate chips, and bake again for a further minute or two.
8. Leave to cool for a few minutes then cute into 12 brownies and serve hot or leave to cool further.

Enjoy :)