EAT RAINBOW LOVE


University of Birmingham graduate with a passion for food & cooking as part of a healthy lifestyle

Twitter: @EatRainbowLove
Instagram: lottierainbow
Showing posts with label cocoa powder. Show all posts

Tuesday, 28 May 2013

Oreo brownies

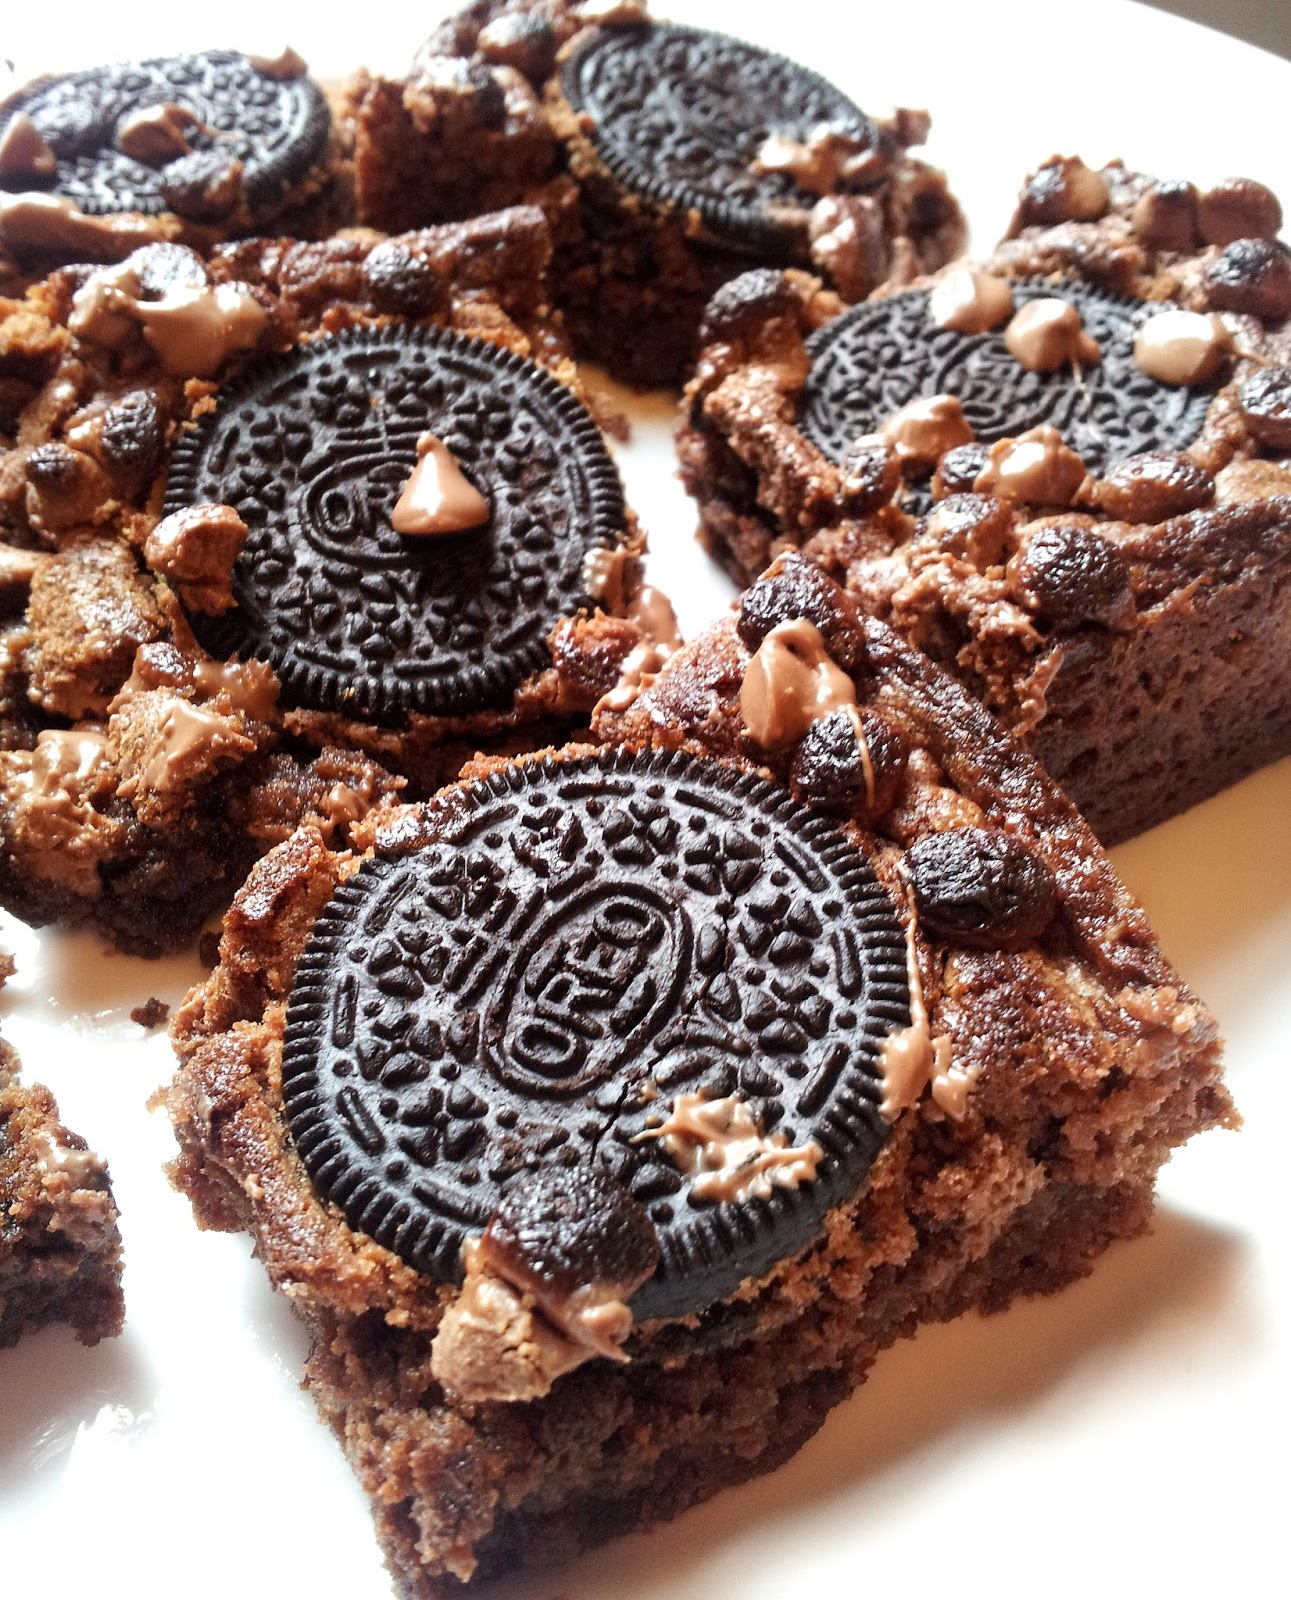
I just made these and tried them hot from the oven and they are divine! It was a bit of an experiment since I couldn't find a recipe for oreo brownies that I liked, so I came up with something and was very nervous but it worked out really well. They are moist and gooey in the middle, and a little crisp and chewy around the edges - the perfect combination. And with the added crunch from the whole oreos and cookie pieces (yes, there are crushed Maryland cookies in here too!), and the soft chocolate chips they have amazing texture. Everyone should go and make these right now, you won't be disappointed.
Makes 12
- 250g salted butter
- 225g caster sugar
- 2 eggs, beaten
- 50g dark chocolate, melted
- 2 tbsp cocoa powder
- 150g plain flour
- 1 tsp baking powder
- dash of milk
- 100g milk chocolate chips
- few Maryland double chocolate chip cookies
- 12 oreos

1. Pre-heat the oven to 180 degrees and grease and line a baking dish.
2. Cream together the butter and sugar in a large mixing bowl until light and fluffy.
3. Whisk in the beaten eggs then stir in the melted chocolate.
4. Fold in the cocoa powder, flour and baking powder until mixed well.
5. Stir in a dash of milk to make the mix creamier, then add half of the chocolate chips (50g) and a few (about 4) crushed Maryland cookies and mix until well combined.
6. Pour this brownie mixture into the prepared tin and spread evenly. Press 12 oreos into the mixture.
7. Bake in the pre-heated oven for around 25 minutes. Remove from the oven and sprinkle with the remaining chocolate chips, and bake again for a further minute or two.
8. Leave to cool for a few minutes then cute into 12 brownies and serve hot or leave to cool further.

Enjoy :)

Saturday, 15 September 2012

Mint chocolate cupcakes

I made these yesterday for my sister's birthday celebrations tonight, and they were so delicious! Chocolate and mint is always the perfect match, and with a mint aero bubble on top, what could be better? These look really cute and taste surprisingly light and refreshing. I used a large star piping nozzle that I recently brought off Amazon and you can really tell the difference - I think these look a lot more professional than previous cupcakes I have made - it's definitely worth the money. These would also look good decorated with after eight mints.
For the chocolate sponges (makes about 24)
- 225 margarine/butter (or both)
- 225g caster sugar
- 4 eggs, beaten
- 225g self raising flour
- 1/2 tsp baking powder
- 2 tbsp semi skimmed milk
- 1 tsp vanilla essence
- 4 tbsp cocoa powder

For the peppermint buttercream
- 150g unsalted butter
- 225g icing sugar
- 2 tbsp hot milk
- 4 tsp peppermint extract (according to taste)
- few drops of green food colouring
- mint aero bubbles, to decorate

1. Pre-heat the oven to gas mark 4 / 180 degrees. Line a few cupcake trays with cupcake cases.
2. Beat together the marg/butter and sugar until light and fluffy. Gradually beat in the eggs, adding flour occasionally if curdling occurs.
3. Sift the remaining flour, baking powder and cocoa powder into the bowl, then gradually whisk in the milk and vanilla essence.
4. Spoon into the cupcakes cases and bake in the oven for around 20 minutes. Leave to cool on a cooling tray.
5. For the butter cream, cream together the butter, sugar and milk until smooth. Add the peppermint extract and food colouring and stir thoroughly. Taste and if necessary add more of the peppermint.
6. Using a disposable piping bag and a large star nozzle, pipe the buttercream on top of each cupcakes - be generous! Place a mint aero bubble on top and voila!
I ran out of buttercream and so decorated the remaining 3 cupcakes like this, ha ha ha it makes me laugh:
Enjoy :)

Monday, 10 September 2012

Double chocolate cookies

I don't usually bake cookies that often because I can never find a simple recipe that works well for me. I like cookies to be softer and have a more chewy texture rather than just crunchy. Although these cookies do have a crisp texture at first, they also have a sort of brownie like texture which I love. This is mainly from using soft brown sugar instead of caster. They are really chocolatey and delicious. I am yet to create a cookie recipe that is crunchy with soft chocolate chunks in, so in the mean time, try these out! I'm sure they will be popular with friends and family as they were with mine.

Makes 24
- 125g butter, softened
- 125g soft brown sugar
- 50g caster sugar
- 1 egg, beaten
- 1/2 tsp vanilla extract
- 125g plain flour
- 35g cocoa powder
- 1/2 tsp bicarbonate of soda
- 75g chocolate, cut into chunks (mixture of milk and dark)

1. Pre-heat the oven to gas mark 4 / 180 degrees. Line several baking trays with baking paper.
2. Beat together the butter and both sugars in a bowl until light and fluffy.
3. Add the egg and vanilla extract and mix until smooth.
4. Sift in the flour, cocoa powder and bicarb of soda and mix until well combined, then stir in the chunks of chocolate.
5. Spoon the cookie mixture onto the baking trays in small, round balls, spaced well apart from each other.
6. Bake in the oven for 10-12 minutes. Leave to cool on the baking trays for 5 minutes, then transfer to a cooling rack.
Enjoy :)

Saturday, 7 April 2012

Easter nest crispy cakes

 These are really quick and easy Easter treats to make! Everyone has probably eaten or made a chocolate crispy cake before but I thought I would post a recipe that I used today so you can all whip these up tonight or tomorrow to finish off the Easter weekend nicely. They are not just for Easter however, these are yummy treats all year round, with or without the mini eggs. I used cornflakes but you can use any cereal really, such as rice crispies, special k etc. I used some summery cupcake cases to brighten these up and get in the Easter/spring spirit!
Makes about 8
- 30g butter
- 50g milk chocolate
- 25g dark chocolate
- 1 tbsp cocoa powder
- 2 tbsp runny honey
- few handfuls of cornflakes (or other cereal)
- Cadbury's mini eggs, to decorate

1. Melt the butter and chocolate over a low heat.
2. Once melted, turn off the heat and stir in the sieved cocoa powder and honey.
3. Stir in handfuls of cornflakes at a time until completely coated in the chocolate mixture.
4. Spoon into cupcake cases, placing a mini egg in the middle of each.
5. Refrigerate for half an hour or until solid!

Enjoy :)

Sunday, 4 March 2012

Chocolate creme oreo brownies

I very rarely bake brownies because I can never seem to get them the right texture or consistency. I baked some for a friends birthday and was adamant that they weren't cooked so I kept putting them back in the oven. Once cooled we were practically eating rocks - delicious rocks but still, the texture clearly wasn't right! Another time, I made some chocolate and raspberry brownies with my friends, which again, were delicious, but were far too gooey.

So anyway I decided to try and give it another go, but again, I struggled a lot with the consistency/texture of the brownies. I did turn the oven down but still I was left with sponge round the edges and goo in the middle. However, this is how most people like brownies and it is brilliant for a dessert hot out the oven with ice cream. But, it isn't the sort of brownie that can be easily cut up into squares and eaten over 2 or 3 days! Maybe I should stick to cupcakes...

**okay just realised the oven had broken halfway through cooking and I didn't even realise - long story! - these will cook fine in that case... oh student kitchens...**

Here is the recipe I used:
- 100g chocolate (I used cadburys milk chocolate giant buttons)
- 100g unsalted butter
- 200g caster sugar (soft brown sugar would have probably been better)
- 3 eggs
- 200g self-raising flour
- 2 tbsp cocoa powder
- 1/2 pack of chocolate creme oreos, crushed

1. Melt the chocolate and the butter in a pan over a low heat.
2. Take off the heat and stir in the sugar and beaten egg.
3. Mix in the flour, cocoa powder and crushed oreos.
4. Pour the mixture into a greased baking tin.
5. Bake at 180 degrees for 15 minutes - mine took so much longer so maybe turn the oven temperature down and adjust cooking time accordingly.
6. Leave to cool in the baking tin.
If you use soft brown sugar instead of caster, maybe some dark chocolate instead of milk, and your oven doesn't break halfway through then these would be perfect!

Enjoy!