EAT RAINBOW LOVE


University of Birmingham graduate with a passion for food & cooking as part of a healthy lifestyle

Twitter: @EatRainbowLove
Instagram: lottierainbow
Showing posts with label sugar. Show all posts

Tuesday, 19 November 2013

Marbled chocolate cheesecake

I wish I could say that I created this recipe but unfortunately, the triumph goes to Mary Berry. I made this for an anniversary party and was nervous because I'd never made a chocolate cheesecake before and didn't know how the marbled effect would turn out, but it was a massive success! Everyone loved it and it turned out to be the most popular dessert. It will definitely impress - super rich, creamy and chocolatey will always be a winner - people didn't believe that it was home-made! Don't shy away from making this because it's baked and more effort than just whacking it in the fridge, baked cheesecakes have a much more velvety texture and are just to die for. You have to make this, and it will be a recipe you are passing on for years, I just wish it was my own!

(I did change the measurements slightly - the original recipe only had 100g biscuits and I found that this just wasn't enough to fill the 8 inch tin)

Quick tip: use only the best ingredients when making a luxury dessert - for me this means McVitie's biscuits, lurpak butter, philadelphia cheese and proper belgium cooking chocolate!

Serves 8-10
- 150g plain chocolate digestive biscuits, crushed
- 75g butter, melted
- 150g plain chocolate
- 700g full fat soft cheese
- 225g caster sugar
- 1/2 tsp vanilla essence
- 2 eggs, beaten

1. Grease an 8 inch spring bottom cake tin and pre-heat the oven to 160 degrees / gas mark 3.
2. Mix together the melted butter and crushed biscuits and press firmly into the bottom of the cake tin.
3. For the cheesecake mixture, beat the soft cheese in a large mixing bowl until smooth. Stir in the sugar and vanilla essence and beat until glossy, then gradually stir in the beaten eggs until fully combined.
4. Melt the chocolate in a separate bowl.
5. Meanwhile, spoon half of the cheesecake mixture onto the biscuit space in separate blobs with gaps in between.
6. Add the melted chocolate to the other half of the cheesecake mixture and mix together until smooth and silky.
7. Spoon the chocolate mixture in between the cheesecake mixture already in the tin, then swirl the top to give a marbled effect.
8. Bake in the oven for 30 minutes or until the cheesecake is puffy round the edges but still soft in the middle. Turn off the oven but leave the cheesecake in there to cool. 
9. Once fully chilled (best overnight in the fridge), run a knife around the edge to loosen the cheesecake then gently remove and you are ready to serve!
Enjoy :)

Friday, 8 November 2013

Apple and Cinnamon Muffins

These are a little bit of heaven. They smell and taste just like autumn - you've got soft apple chunks, 'chewy' dried cranberries, crunchy pumpkin seeds and the warming cinnamon flavour. These muffins are perfect for this time of year - they are super moist and crisp on top just the way I like them. They kind of taste like Starbucks pumpkin spiced lattes which are so yummy, I think it must just be the cinnamon.These are honestly one of my favourite baking creations to date, I will be coming back to this recipe every autumn now. If you make them please have one straight from the oven for me! mm mm

Makes 8 muffins
- 200g plain flour
- 50g soft brown sugar (plus extra for the topping)
- 100g caster sugar
- 2 1/2 tsp baking powder
- pinch of salt
- 2 tsp ground cinnamon (plus extra for the topping)
- 100ml milk
- 80ml sunflower oil
- 1 large egg, beaten
- few drops of vanilla essence
- 1 large cooking apple, peeled, cored and chopped
- 75g dried cranberries
- 50-75g pumpkin seeds (optional)

1. Pre-heat the oven to 200 degrees / gas mark 6.
2. Mix together all the dried ingredients in a large mixing bowl (flour, sugars, baking powder, salt and cinnamon)
3. In a jug, mix together the milk, oil and beaten egg until combined.
4. Gradually stir in the mixture in the jug into the dry ingredients until combined, then add in the apple chunks and mix together.
5. Next, stir in the dried cranberries and pumpkin seeds, if using, and mix until well combined.
6. Line a muffin tin with muffin cases and spoon the mixture into them.
7. Fill them quite full, then place in the oven for around 20 minutes or until golden grown on top.
8. When they are done, take them out of the oven but leave them in the tray for a few minutes while you mix together some brown sugar and ground cinnamon in a small bowl, for the topping.
9. Sprinkle the sugar and cinnamon mixture over the top of each muffin whilst still hot, this just makes them look nicer and gives extra flavour and sweetness! Place on a wired tray to cool or enjoy warm from the oven.
I accidentally ate one when it was hot out of the oven (don't worry, it was a mis-shapen one because it didn't fit in the muffin tray). It was so delicious - this is what it looked like inside, of course the other muffins looked better because they weren't flat and squished.  

Enjoy :)

Wednesday, 24 July 2013

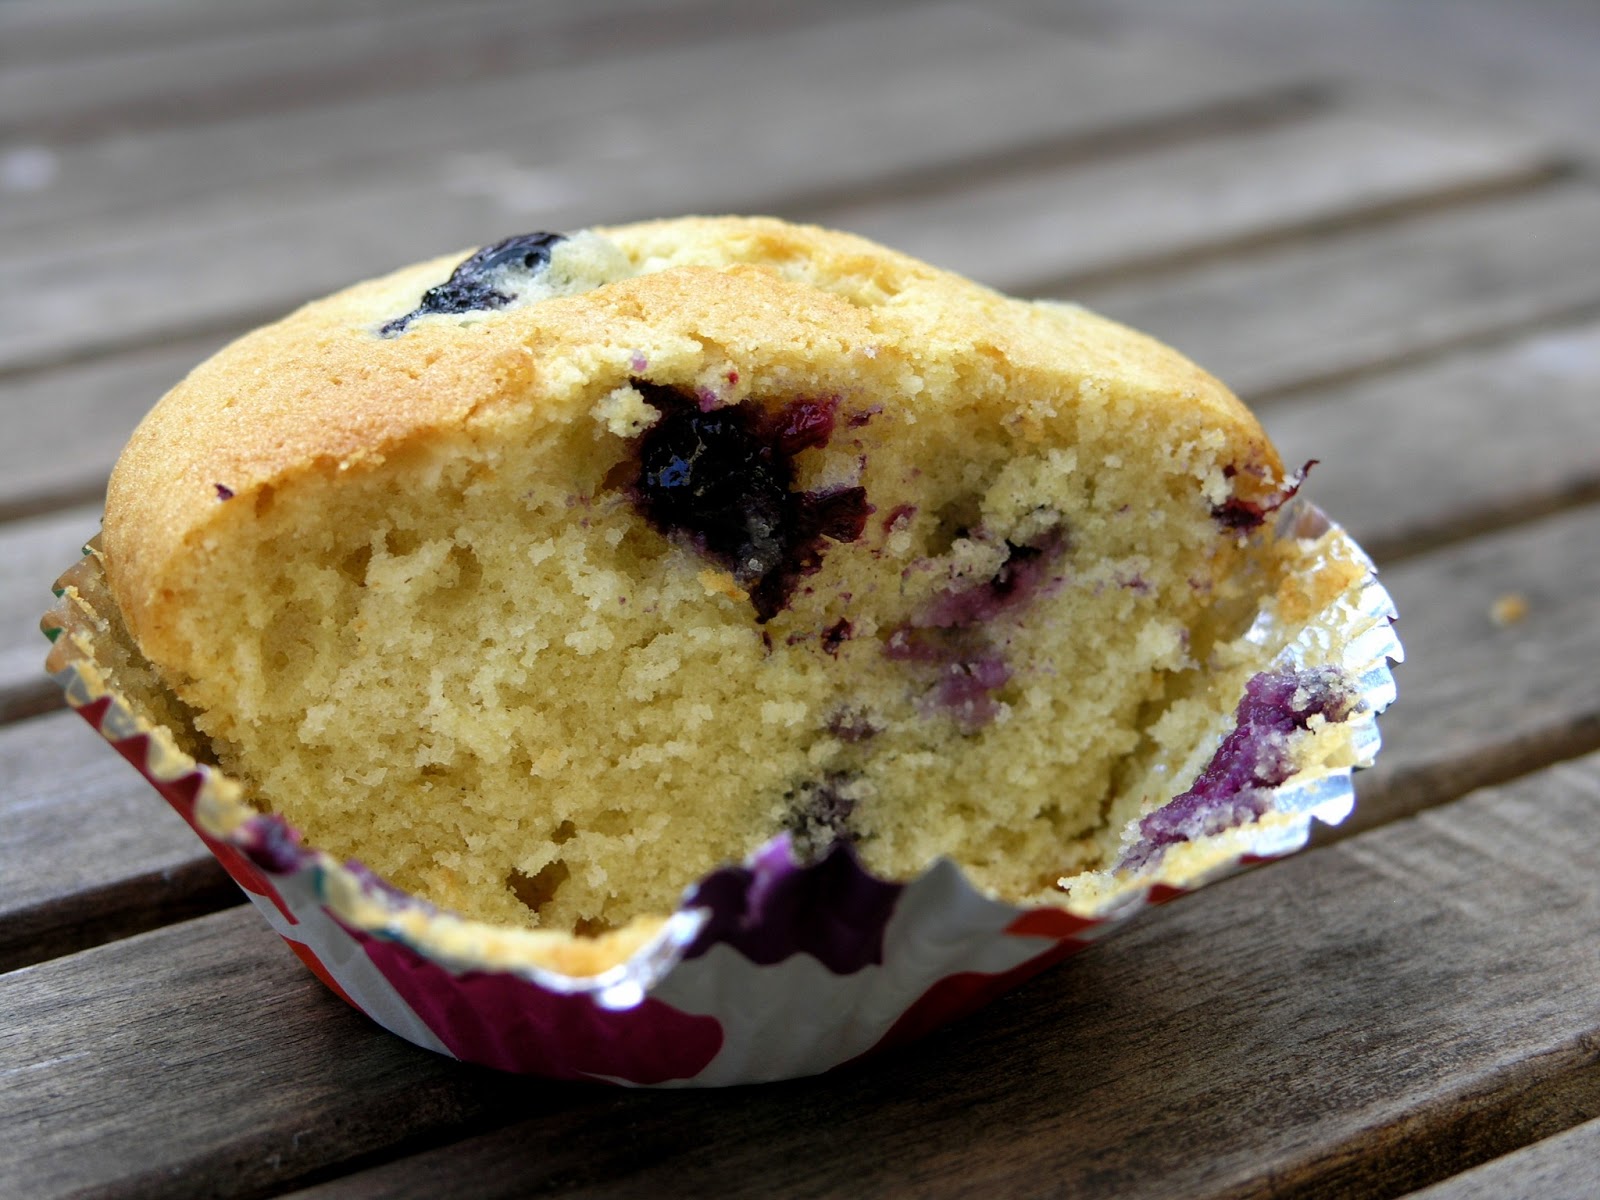
Blueberry muffins

These sweet, fruity muffins are so light and full of flavour - perfect for summer. They are delicious fresh out of the oven, but still have a crisp top and juicy, moist inside when cooled. They are super easy to whip up so give them a try, they will not disappoint. 

Makes 12 muffins
- 110g butter
- 250g caster sugar
- 2 eggs, beaten
- 250g plain flour
- 2 tsp baking powder
- 125ml milk
- 225g fresh blueberries

1. Pre-heat the oven to 180 degrees, and line a muffin tin with cases.
2. Cream together the butter and sugar until smooth.
3. Whisk in the eggs, then add the flour and baking powder, mixing well.
4. Stir in the milk until the mixture is smooth. Fold in 3/4 of the blueberries.
5. Spoon the mixture into the muffin cases about 2/3 full.
6. Press the remaining blueberries evenly into the mixture in each muffin case.
7. Bake in the oven for 25-30 minutes, or until risen and golden brown. Cool on a wired rack.

 Enjoy :)

Tuesday, 28 May 2013

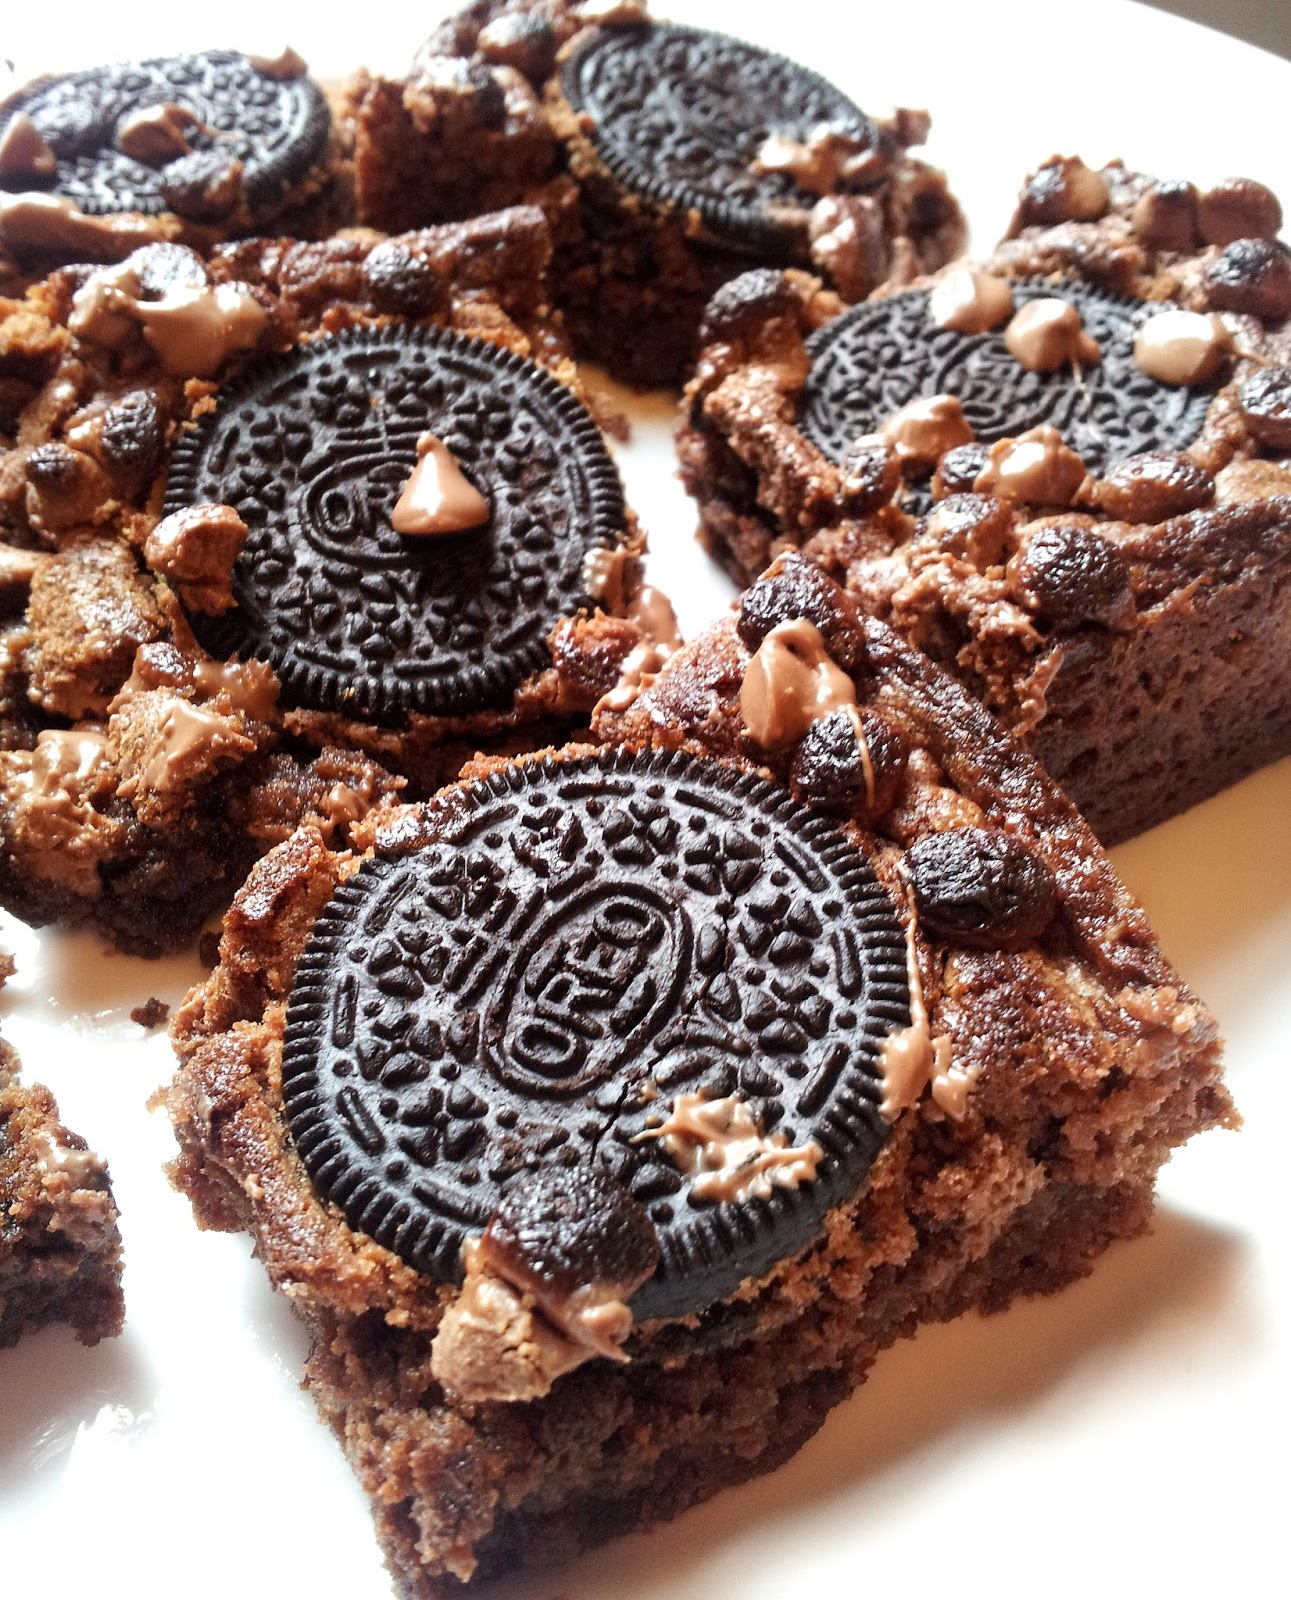
Oreo brownies

I just made these and tried them hot from the oven and they are divine! It was a bit of an experiment since I couldn't find a recipe for oreo brownies that I liked, so I came up with something and was very nervous but it worked out really well. They are moist and gooey in the middle, and a little crisp and chewy around the edges - the perfect combination. And with the added crunch from the whole oreos and cookie pieces (yes, there are crushed Maryland cookies in here too!), and the soft chocolate chips they have amazing texture. Everyone should go and make these right now, you won't be disappointed.
Makes 12
- 250g salted butter
- 225g caster sugar
- 2 eggs, beaten
- 50g dark chocolate, melted
- 2 tbsp cocoa powder
- 150g plain flour
- 1 tsp baking powder
- dash of milk
- 100g milk chocolate chips
- few Maryland double chocolate chip cookies
- 12 oreos

1. Pre-heat the oven to 180 degrees and grease and line a baking dish.
2. Cream together the butter and sugar in a large mixing bowl until light and fluffy.
3. Whisk in the beaten eggs then stir in the melted chocolate.
4. Fold in the cocoa powder, flour and baking powder until mixed well.
5. Stir in a dash of milk to make the mix creamier, then add half of the chocolate chips (50g) and a few (about 4) crushed Maryland cookies and mix until well combined.
6. Pour this brownie mixture into the prepared tin and spread evenly. Press 12 oreos into the mixture.
7. Bake in the pre-heated oven for around 25 minutes. Remove from the oven and sprinkle with the remaining chocolate chips, and bake again for a further minute or two.
8. Leave to cool for a few minutes then cute into 12 brownies and serve hot or leave to cool further.

Enjoy :)

Monday, 17 December 2012

Raspberry swirl cupcakes

These cupcakes are by far my favourite out of all the ones I've ever made (and that's a lot!). I made these for my friends birthday, and I love how pretty and girly they are. The cream cheese frosting is to die for and is made with raspberry jam as well so has a delicious, sweet flavour, and the way the frosting is piped just adds something a bit different, giving a marbled effect. The sponge recipe is the one I always use but I will write everything down below anyway! Oh, and if you don't like cream cheese don't be put off, the frosting tastes amaaaazing... my friend hates cream cheese and refused the cream cheese icing on my carrot cupcakes so this time I didn't tell her it had cream cheese in and she loved it so much she was even eating it out the bowl!
For the sponges (makes 12)

- 125 margarine/butter (or both)
- 125g caster sugar
- 2 eggs, beaten
- 125g self raising flour
- 1/4 tsp baking powder
- 1 tbsp semi skimmed milk
- 1/2 tsp vanilla essence

For the frosting
- 50g butter (I always use lurpak slightly salted cause think it tastes the best)
- 300g icing sugar, sifted
- 125g full fat cream cheese
- 2 tbsp raspberry jam
- pink food colouring
- edible glitter

1. Preheat the oven to 190 degrees / gas mark 5. Line a cupcake tray with cases.
2. Cream together the butter and sugar until light and fluffy. Gradually whisk in the egg then fold in the flour and baking powder.
3. Add the milk and vanilla essence and beat until fully combined and smooth.
4. Spoon into cupcake cases and bake in the oven for about 15 minutes, or until risen, firm and golden brown. Leave to cool.
5. Meanwhile, to make the cream cheese frosting, beat the butter and gradually add the icing sugar until light. Whisk in the cream cheese until light and fluffy.
6. Transfer half the frosting mixture into another bowl and add the jam and a few drops of food colouring, stirring until fully mixed. 
7. In a piping bag with a large, star shaped nozzle, spoon raspberry frosting on one side of the bag and the plain frosting on the other (if you are using a tube syringe instead of a piping bag like i did, then alternating the different frostings on top of one another works just as well). Pipe generous swirls on top of the cupcakes.
8. Don't forget to sprinkle with glitter!

*These will last for up to 3 days - keep them in a cool place in an airtight container - don't forget there is cream cheese in the frosting so they will go off quicker!*

Friday, 14 December 2012

Apple and plum crumble

Firstly, sorry for the bad photo quality - if you read my welcome back post it explains why and I will put more effort into making them more appealing! This was a delicious dessert, perfect for a winter evening. I'm not a huge crumble fan but I do love it every once in a while and it's a lot of fun to make.

Serves 2-3
- 400g apples, peeled, cored and slices
- 400g plums, stones removed and quartered
- 100g demerara/brown sugar
- 1 tsp ground cinnamon
- 2 tbsp water (add more if needed)

- 75g butter
- 150g self raising flour
- 100g brown sugar

1. To make the filling, add the apples, plums, sugar, cinnamon and water to a pan and cook over a low heat, stirring occasionally, for 20-30 minutes, are until stewed. Spoon into a baking dish.
2. Pre-heat the oven to 180 degrees.
3. To make the crumble topping, simply rub together the butter and flour with your fingertips until it resembles breadcrumbs, then mix in the sugar.
4. Press down the crumble topping onto the fruit until compact. Bake in the oven for around 20 minutes, or until hot in the middle and golden brown - serve warm with cream!

Enjoy :) 

Tuesday, 23 October 2012

Millionaire's shortbread

I've been tempted by this recipe for a really long time - it's from Lisa Faulkner's cookbook (my all time favourite recipe book). I was going to change it up a bit, but I'd heard how good these were so I decided to just stick to what she wrote so no credit goes to me on this recipe really. The only change I made was mixing dark and milk chocolate together for the topping, since I think all dark is too bitter and all milk is too sickly... This is a great recipe, so definitely try it out, I had a lot of fun making it - never made caramel before and it's surprisingly easy and tastes so delicious so is definitely worth all the stirring! 

Makes about 12 squares
- 125g butter or margarine
- 50g caster sugar
- 175g self raising flour
- 175g dark and milk chocolate (i used 80% dark cocoa and cadbury's dairy milk)

For the filling:
- 200g sweetened condensed milk
- 125g butter
- 125g caster sugar
- 2 tbsp golden syrup

1. Preheat the oven to 180 degrees and grease and line a baking tin (roughly 7 x 11 inches)
2. To make the shortbread base, cream the butter and sugar together until light and fluffy, then fold in the flour until well mixed.
3. Press the mixture evenly into the tin and bake in the oven for about 12 minutes, or until golden, and leave to cool.
4. Meanwhile, for the filling, place all of the ingredients in a saucepan and gently bring to the boil. Then simmer for around 5-10 minutes, stirring continuously so the sugar doesn't stick to the pan and you get a soft,  even texture. When it is a light caramel colour take the pan off the heat and pour over the shortbread base.
5. Leave this to cool/set. Then, melt the chocolate and drizzle over the caramel, spreading evenly and thickly. Place in the fridge to set for an hour or two.
6. Cut into squares, gently, with a sharp knife and voila!
Enjoy :)

Saturday, 15 September 2012

Mint chocolate cupcakes

I made these yesterday for my sister's birthday celebrations tonight, and they were so delicious! Chocolate and mint is always the perfect match, and with a mint aero bubble on top, what could be better? These look really cute and taste surprisingly light and refreshing. I used a large star piping nozzle that I recently brought off Amazon and you can really tell the difference - I think these look a lot more professional than previous cupcakes I have made - it's definitely worth the money. These would also look good decorated with after eight mints.
For the chocolate sponges (makes about 24)
- 225 margarine/butter (or both)
- 225g caster sugar
- 4 eggs, beaten
- 225g self raising flour
- 1/2 tsp baking powder
- 2 tbsp semi skimmed milk
- 1 tsp vanilla essence
- 4 tbsp cocoa powder

For the peppermint buttercream
- 150g unsalted butter
- 225g icing sugar
- 2 tbsp hot milk
- 4 tsp peppermint extract (according to taste)
- few drops of green food colouring
- mint aero bubbles, to decorate

1. Pre-heat the oven to gas mark 4 / 180 degrees. Line a few cupcake trays with cupcake cases.
2. Beat together the marg/butter and sugar until light and fluffy. Gradually beat in the eggs, adding flour occasionally if curdling occurs.
3. Sift the remaining flour, baking powder and cocoa powder into the bowl, then gradually whisk in the milk and vanilla essence.
4. Spoon into the cupcakes cases and bake in the oven for around 20 minutes. Leave to cool on a cooling tray.
5. For the butter cream, cream together the butter, sugar and milk until smooth. Add the peppermint extract and food colouring and stir thoroughly. Taste and if necessary add more of the peppermint.
6. Using a disposable piping bag and a large star nozzle, pipe the buttercream on top of each cupcakes - be generous! Place a mint aero bubble on top and voila!
I ran out of buttercream and so decorated the remaining 3 cupcakes like this, ha ha ha it makes me laugh:
Enjoy :)